Create Facebook Business
Log on to business.facebook.com/settings
Click on Create Business.
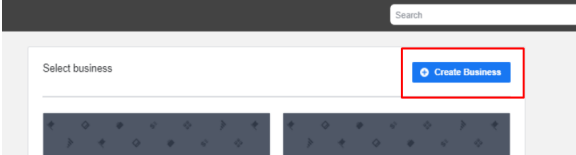
▪ Enter your business name, your name, and work email address.
▪ Click on Submit.
If a business account is already associated, then directly click on the ORG to enter FB
business profile.
On the left tab, please navigate to Business Info.
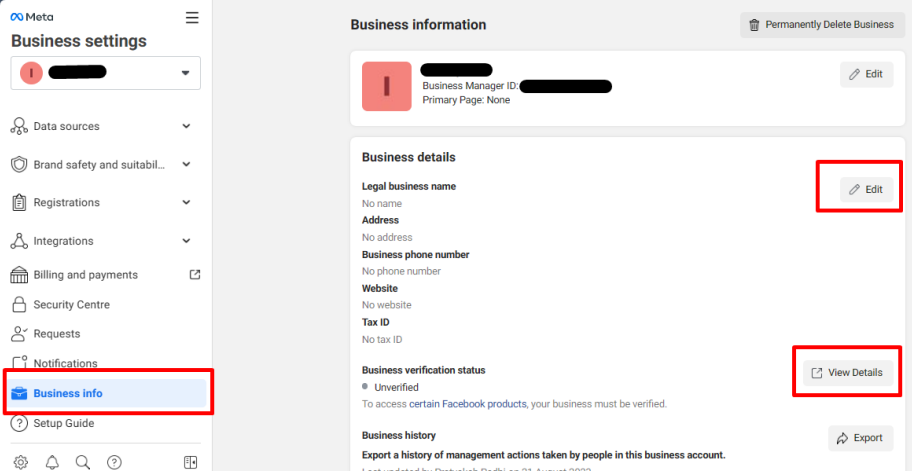
▪ Check if the Business Verification status is Verified / Unverified.
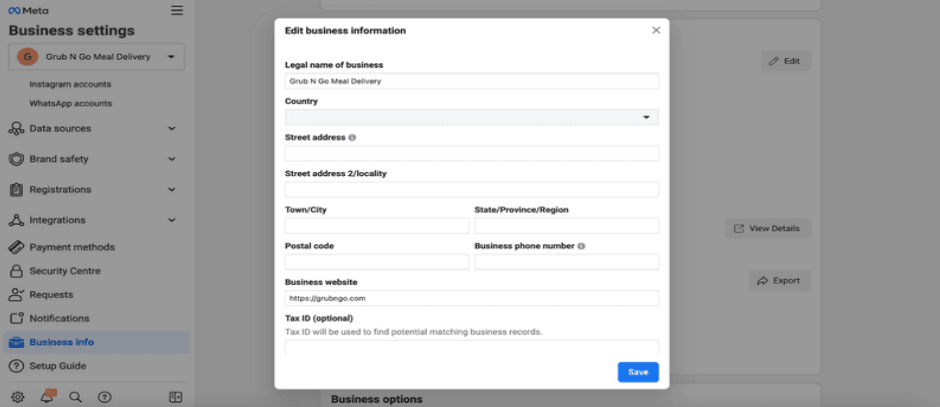
If Unverified, navigate to Business Details → Click Edit, and enter the details that exactly match with the Legal Document of your Organization.
Preferred docs: GST, COI, Phone Bill, and Bank Statement
Refer this URL for accepted documents – https://www.facebook.com/business/help/159334372093366
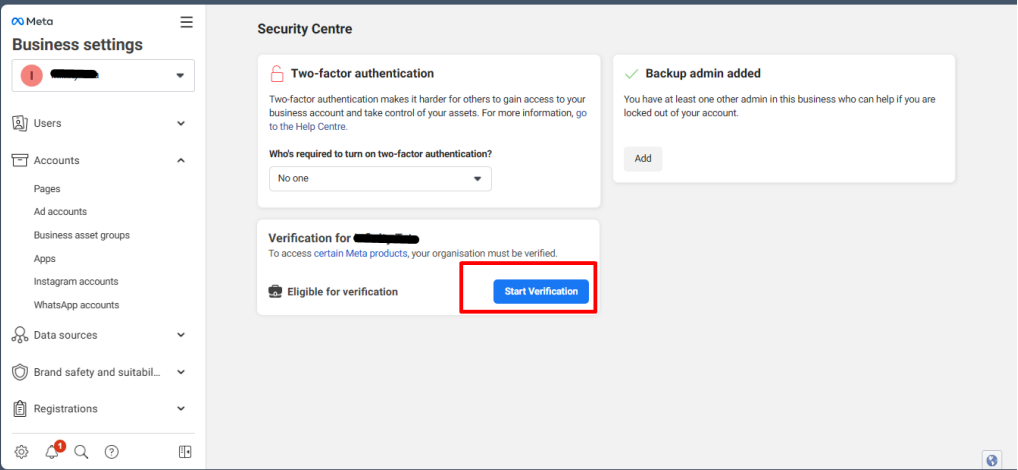
Next, go to the Business Manager’s Security Centre.
▪ Click Start verification.
▪ If In-eligible for verification – Refer from 9th slide

The Legal Name in the legal document (required for verification) should be present in the website’s footer, as shown below
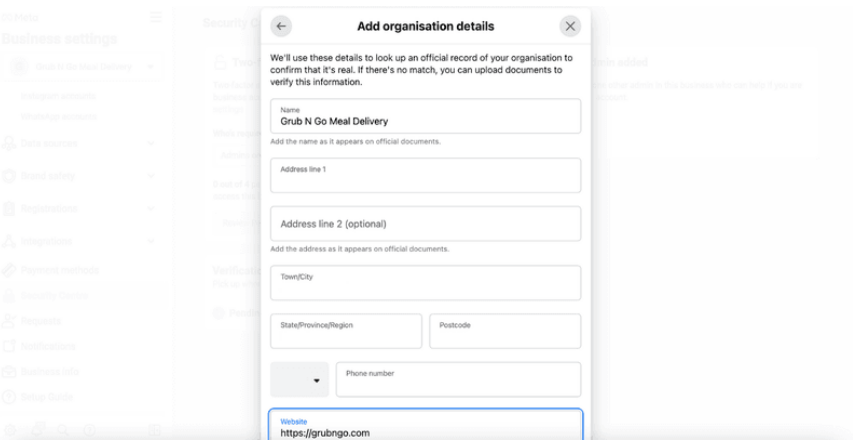
Please add your organization’s details.
If you’ve already filled in your company details in the Business Info section, this section will be auto-filled.
Double-check the information to ensure that they are accurate as per your legal document.
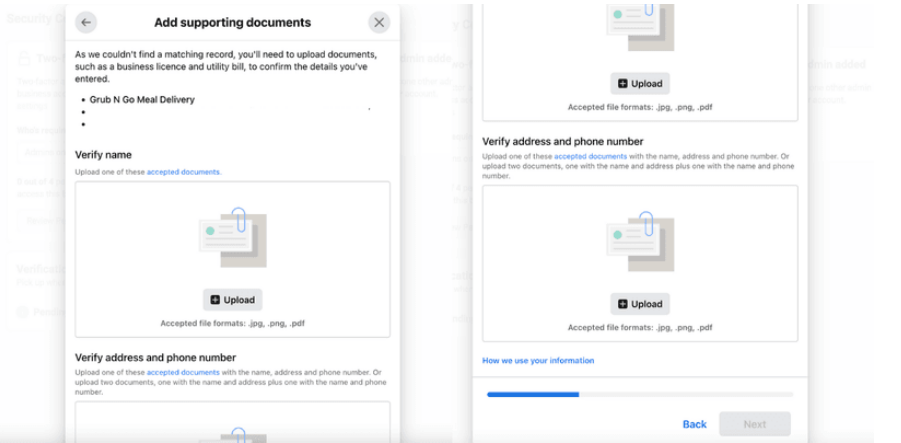
▪ Add supporting documents to prove your business legal details entered, and click on submit.
Select your preferred contact method to receive a confirmation code to confirm your connection to the business.
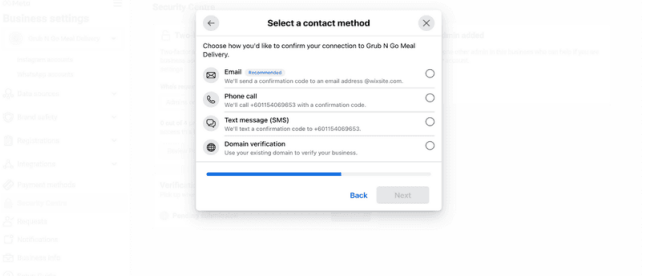
Preferably, select Email and provide your Email ID associated with your organization (domain associated with your website) to get a confirmation code. This step depends on the contact method you’ve selected in the previous step.
Input the confirmation code and click Next. If you did not receive a verification code, click on Resend Code. You can also change your preferred contact method if your chosen method isn’t working.
If Ineligible for verification:

Create a Meta for Developer’s account:
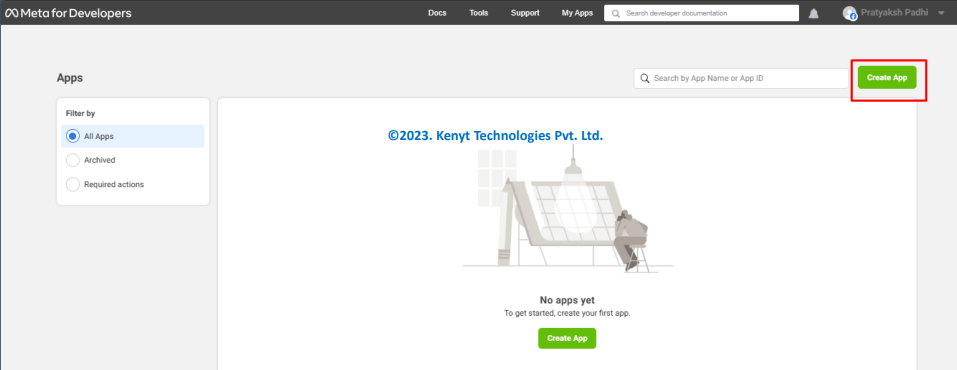
Log on to https://developers.facebook.com/
▪ Click on Create App
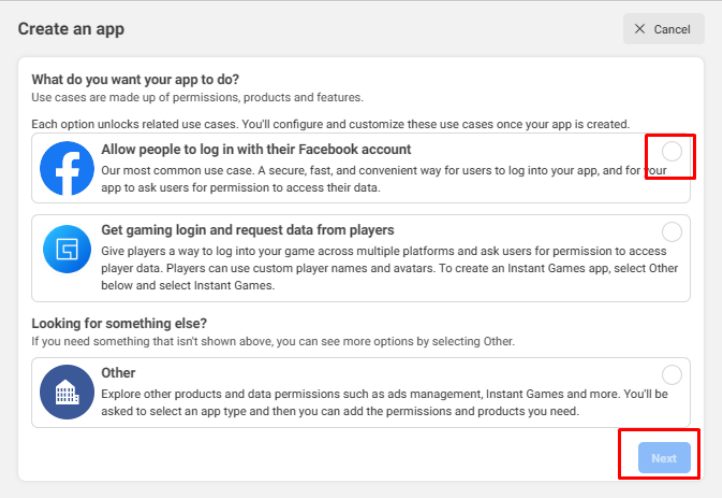
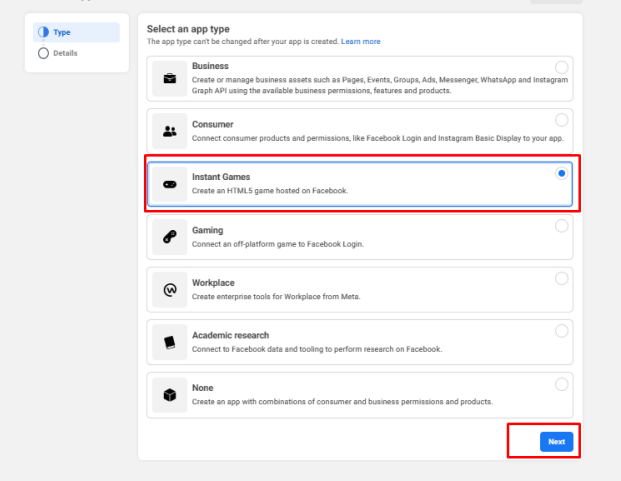
▪ Select any option and click Next
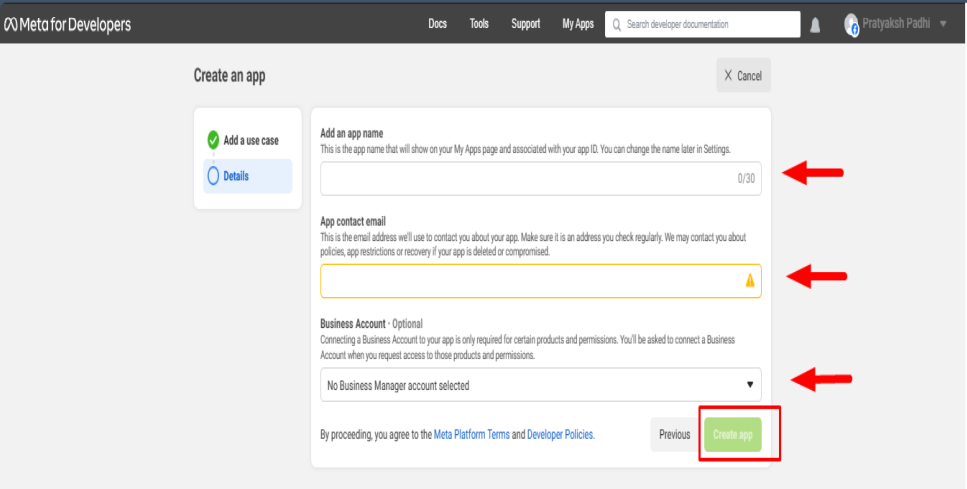
Fill in all the fields, as highlighted in the below screenshot and click on Create app
App name could be your Org Name
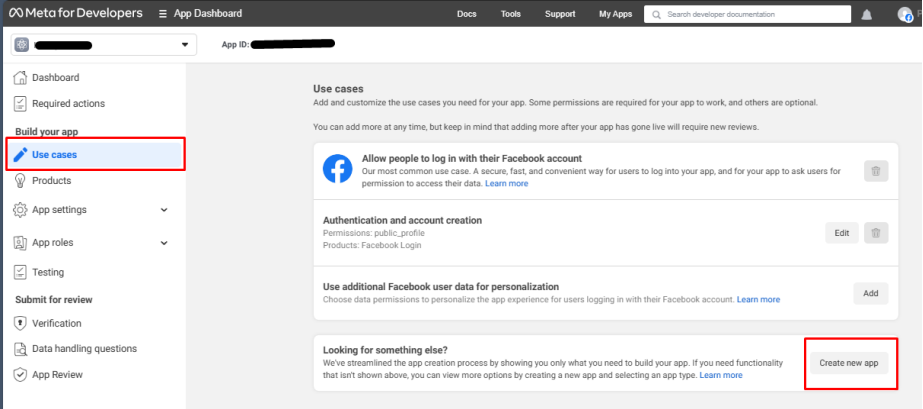
Click on Use Cases on the left tab → Click on Create new app
Next, select Instant Games
▪ Again, fill in all the fields and click on Create App

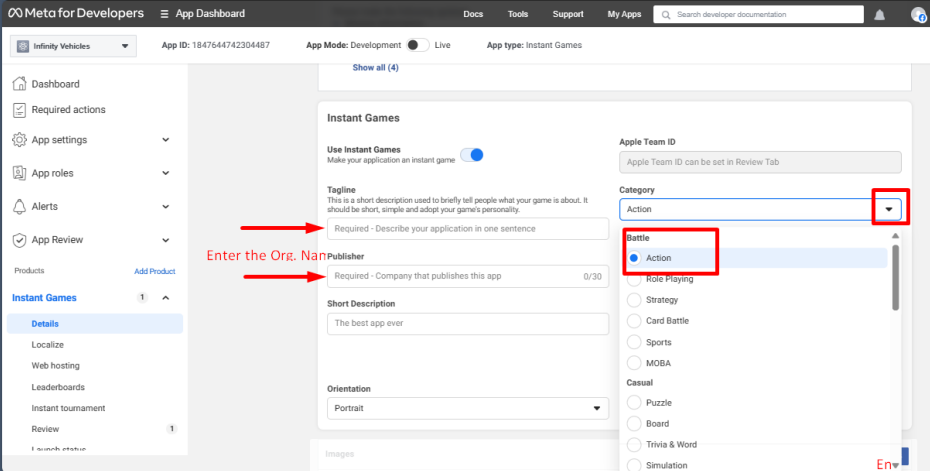
Click on Instant Games → Setup

Enter the Org. Name in Tagline and Publisher and select Action in the provided dropdown
for Category.
Scroll below and click on Save Changes
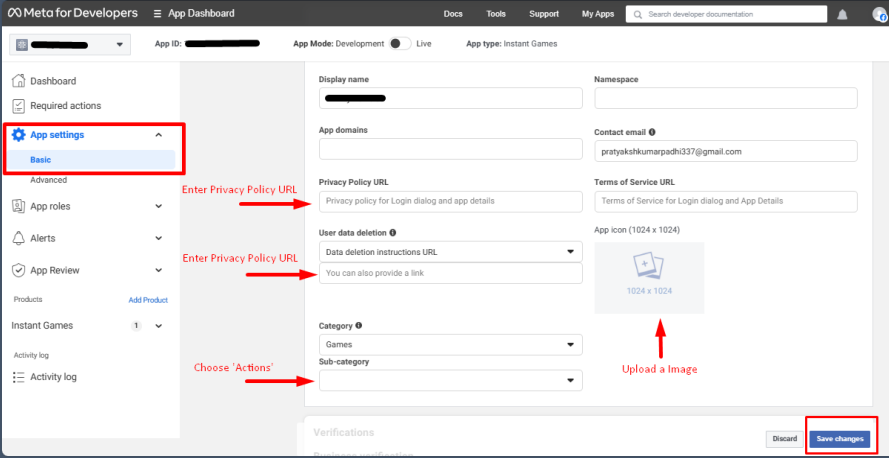
Enter the details for highlighted sections, as per the below screenshot, and click on Save
Changes.
You can download a sample image from the link (with 1024×1024 pixels, as required)–
https://ibb.co/Jdd6XBY
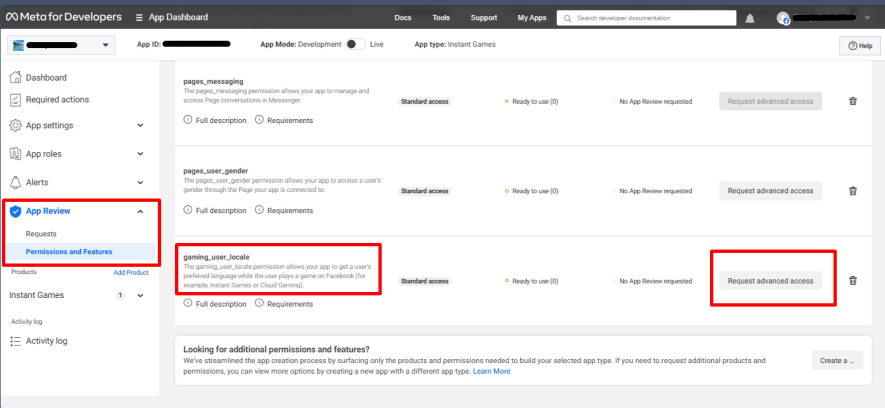
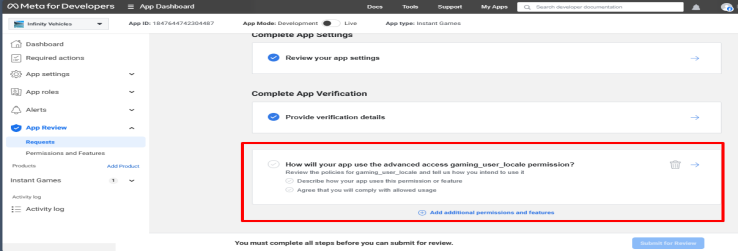
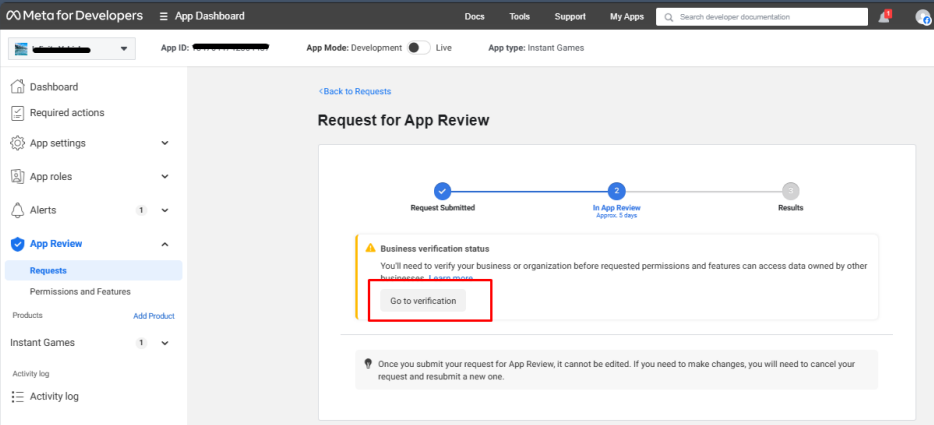
Click on App Review → Permission and Features and Request Advance Access
→Edit App Review Request
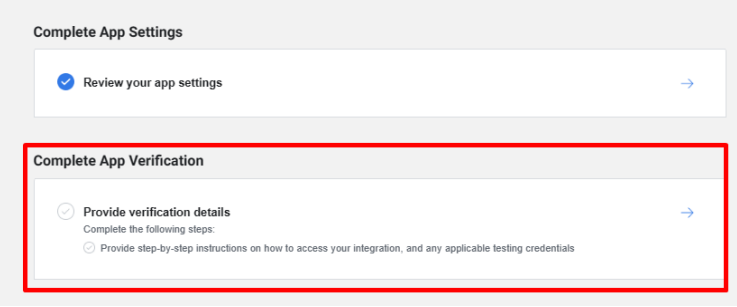
Click on Complete App Verification
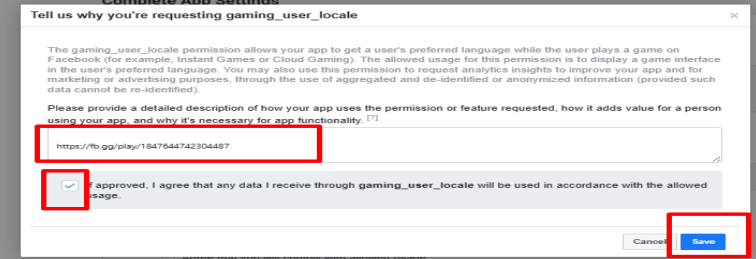
Select the URL and paste it into the box provided.

Click on the box and paste the same URL into the box.
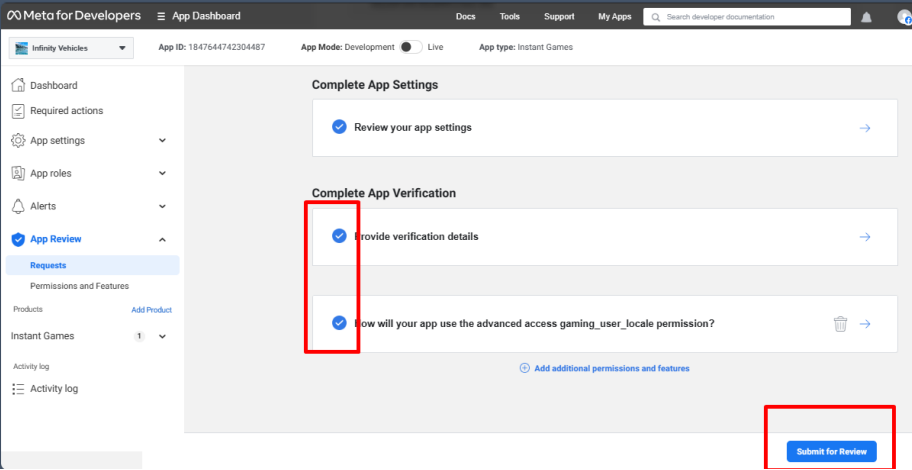
Click on Submit Review below.
Click on Go to Verification
Click on Start Verification
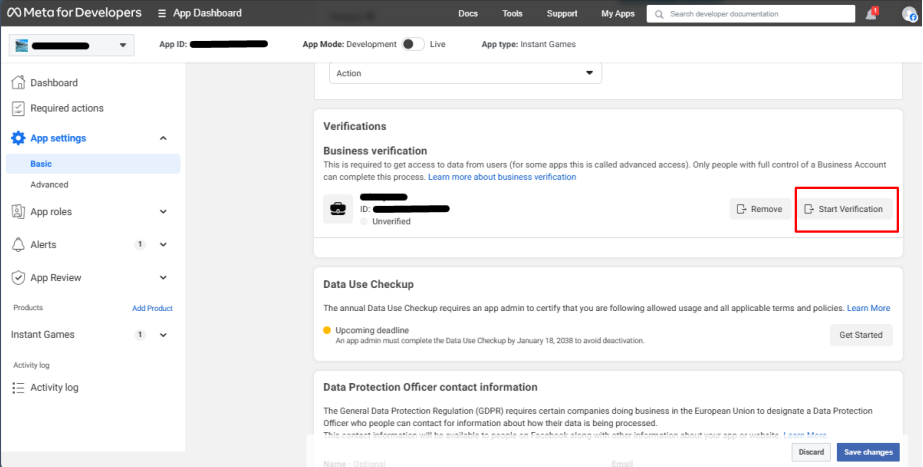
Click on Start Verification and refer from 3rd slide.